
A mini Android phone with an emulator, wondered if there’s any TI-89 Titanium smaller than this.

A mini Android phone with an emulator, wondered if there’s any TI-89 Titanium smaller than this.
The Jetson Nano is a machine learning development board from Nvidia. It sports a 128 core GPU along with ARM CPU running Ubuntu. It is great for neural network based AI development and prototyping intelligent IoT applications.

For the 2G model, it is powered by a Type C USB port. Power supply unit is not included. Meeting the minimum of 5.1V at 3A power requirement will guarantee best performance, while ordinary power supply for phones should be enough for average usage.

An interesting application with the pre-installed OpenCV is to read One Time Password (OTP) from phone. OTP is part of a security design known as multi-factor authentication (MFA). It has been long used by applications requiring higher level of authentication requirements like online banking. Before smart phones, OTP devices known as hard token are distributed to end users. Nowadays, applications installed in smart phones is the mainstream. The idea of OTP is simple, it is a series of digits, usually comprised of six, that will change every minute. End users are to provide this OTP in addition to user name and password.
With the Jetson Nano and OpenCV, the only additional software to install is Tesseract from Google. It is an OCR application that can run on multiple platforms, including Ubuntu. Although it is not optimized for CUDA, it still perform satisfactorily as shown in the below test with Fortinet application on Android phone.
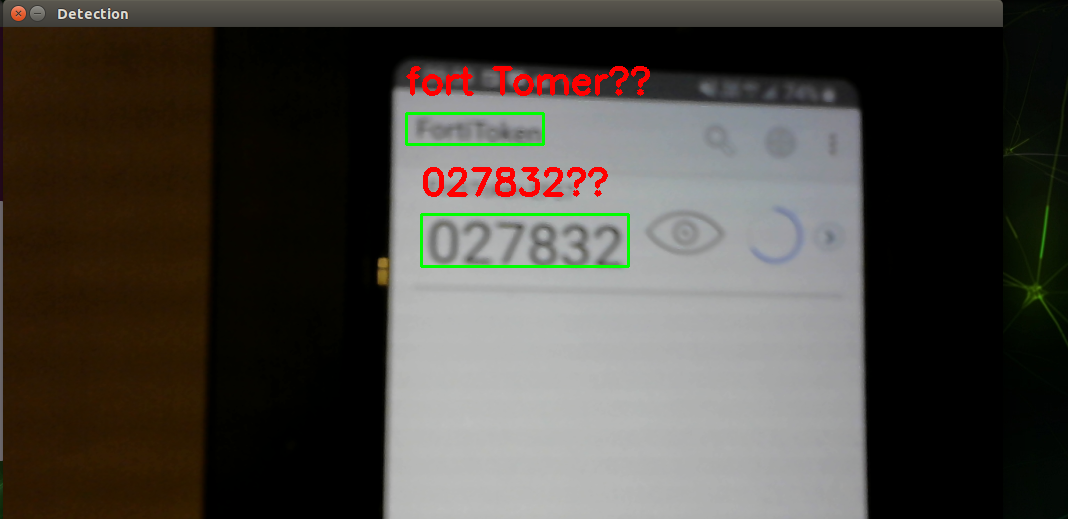
The camera used is a LogiTech c270 camera which is officially supported on the Jetson platform. The focus is not adjustable for it is designed as a general purpose web cam. Even with a blurred video feed, recognition rate for digit is still good.
Pharmaceutical companies often report vaccine effectiveness in a simple percentage, like “more than 90% effective in preventing COVID-19 in participants without evidence of prior SARS-CoV-2 infection in the first interim efficacy analysis” from Biontech / Pfizer.
The sample vaccine efficacy can be calculated by the following simple formula:

where cv and cp are test subjects contracted the virus after vaccine and placebo, while nv and np are the total number of test subjects with vaccine and placebo respectively. This ratio is also known as incidence rate ratio (IRR).
This is a simple and easy to understand measure of how well the vaccine performs. Another good indicator from clinical trial result is the Confidence Interval. Based on the method using Taylor series described in this paper by CDC (code below in R):
arv = cv/nv
arp = cp/np
ci.lower = exp(log(IRR) - 1.96 * sqrt((1 - arv)/cv + (1 - arp)/cp))
ci.upper = exp(log(IRR) + 1.96 * sqrt((1 - arv)/cv + (1 - arp)/cp))
IRR.ci = c(ci.lower, ci.upper)
VE.ci = rev(1 - IRR.ci)
round(VE.ci * 100,1)
This will give a 95% confidence interval, for example, 89.96% to 97.57% for a vaccine.
A team of researchers from University of Chicago’s Sand Lab recently published a tool called Fawkes to protect privacy from large scaled facial recognition especially on social media. It claims to defeat ubiquitous and common facial recognition servers from Azure and Amazon. It is also very easy to use, just pass the photo file to it and instead post the original photo file, post the one processed by Fawkes. From naked human eyes, the two photos are identical. The magic spell cast by Fawkes is, those AI algorithm will break down to know who you are.
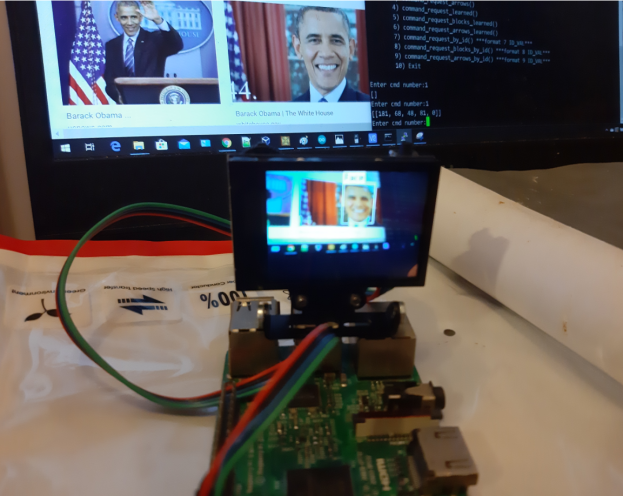
To see how good it works, I got my feet wet and trained on Google Colab with ten images each of two US Presidents. With only a small samples, different parameters are tuned for an optimal prediction mode.

It was meant to be just a quick test and as such only achieved an accuracy of about 88%.


The trained model is saved and here goes the same image set processed by Fawkes. It appears Fawkes did cloaked some images and lead my trained model to false classification. Fawkes is targeting models trained for huge population data set, while my test only consisted of two sample class. Nevertheless, research to protect personal privacy are very important these days along with the advance of artificial intelligence. So is the understanding of the technology behind the hood.
The HuskeyLens is a compact AI machine vision sensor board geared to add machine vision to robot and IoT applications. It sports everything a developer can dream of for machine vision capability be added to their favorite board at an affordable price point.
The board is equipped with a Kendryte K210 vision processor, an OV2640 camera, and a 2.0″ screen with 320 x 240 resolution. Two control buttons for end users to navigate its menu. A four wire interface is provided (connecting wire is bundled in the package) for either UART or I2C connections. Firmware and source code are available for download from the manufacturer’s wiki site.
For a quick out of the box test on the Raspberry Pi platform, just download the library and configure the I2C on the Pi.
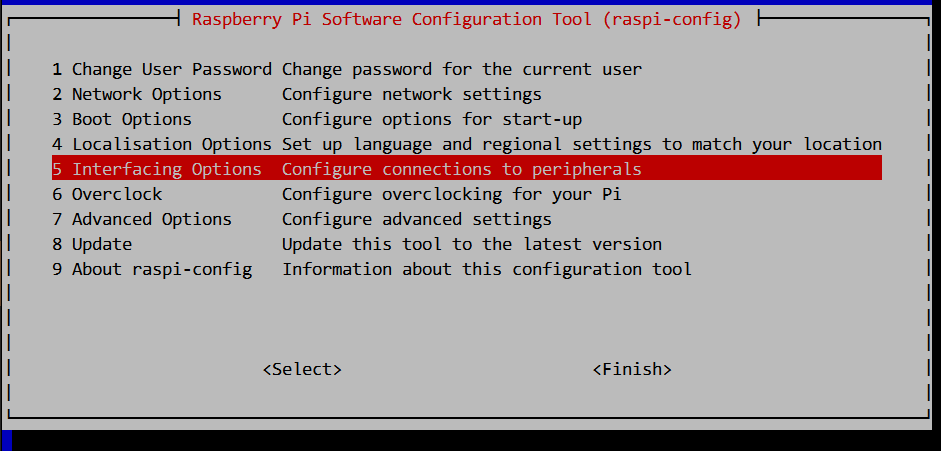
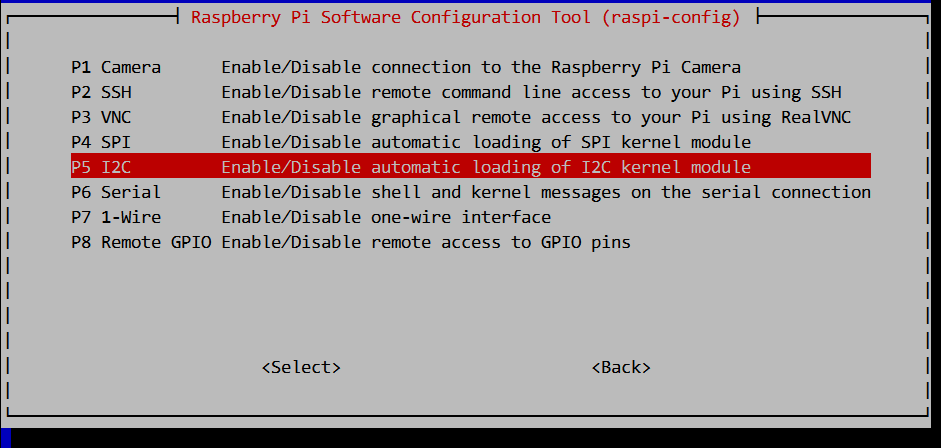
Connect the HuskyLens to the Pi with the four wire interface. Configure the HuskyLens to interface with I2C, and choose from face recognition or learn from object.

Run the sample Python script which is a simple command line menu interface, and see how easy it is to add machine vision.

Although I am not sure about the definition to this day, six years ago I tinkered my first IoT device that, like most prototypes back then, is equipped with environmental sensors with connectivity to the Internet.
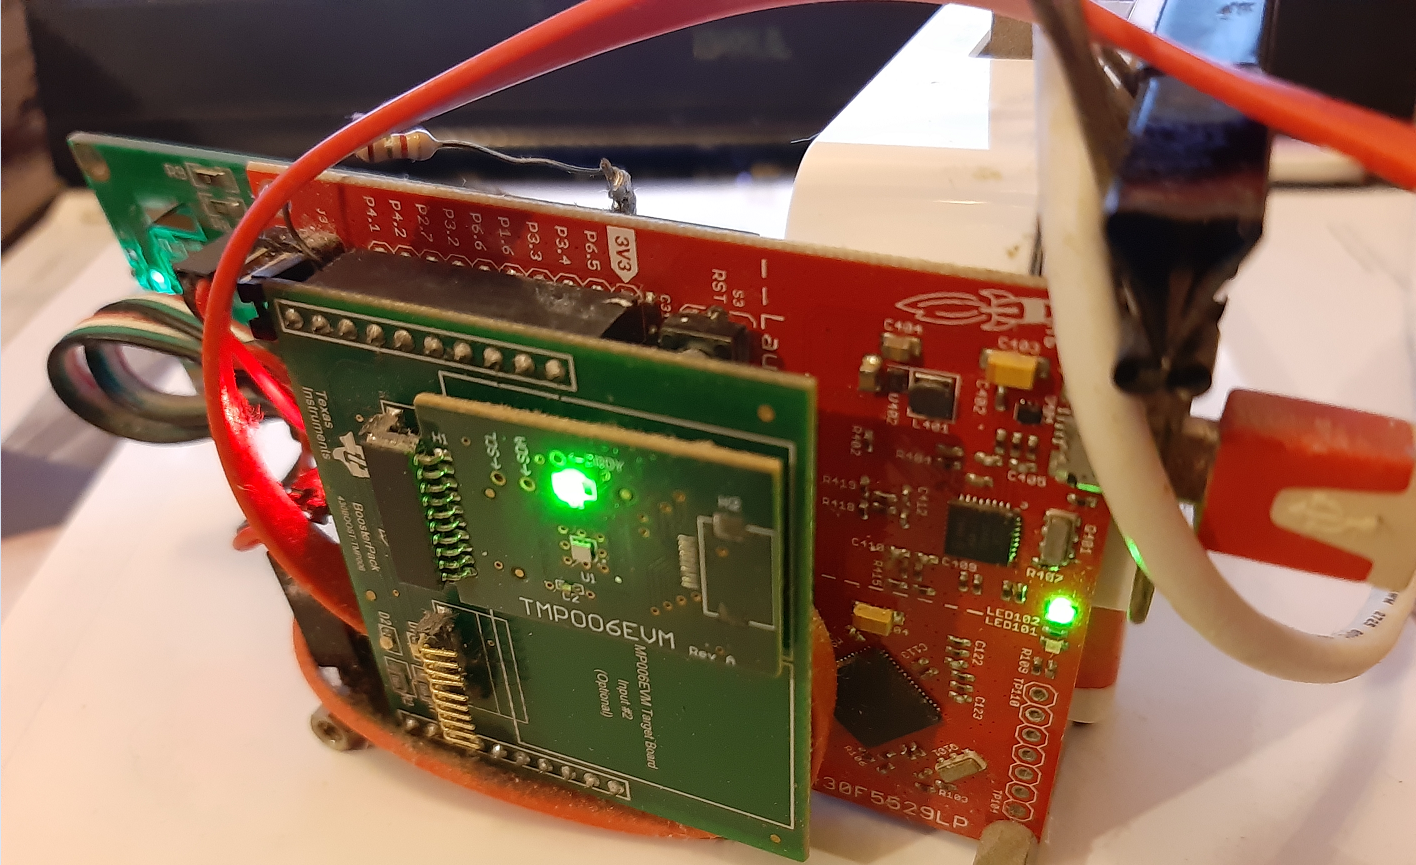
It looks clumsy, with a Texas Instruments MSP430 F5529 Microcontroller development board, also TI’s TMP006 non-contact infrared sensor, an OpenWRT flashed TP Link NR-703N WiFi router, and a 16×2 LED display.

This little toy has been sitting next to my computer since its first reported temperature to the Internet via Exosite which partnered with TI to provide free trial of their IoT services to TI’s development board users.
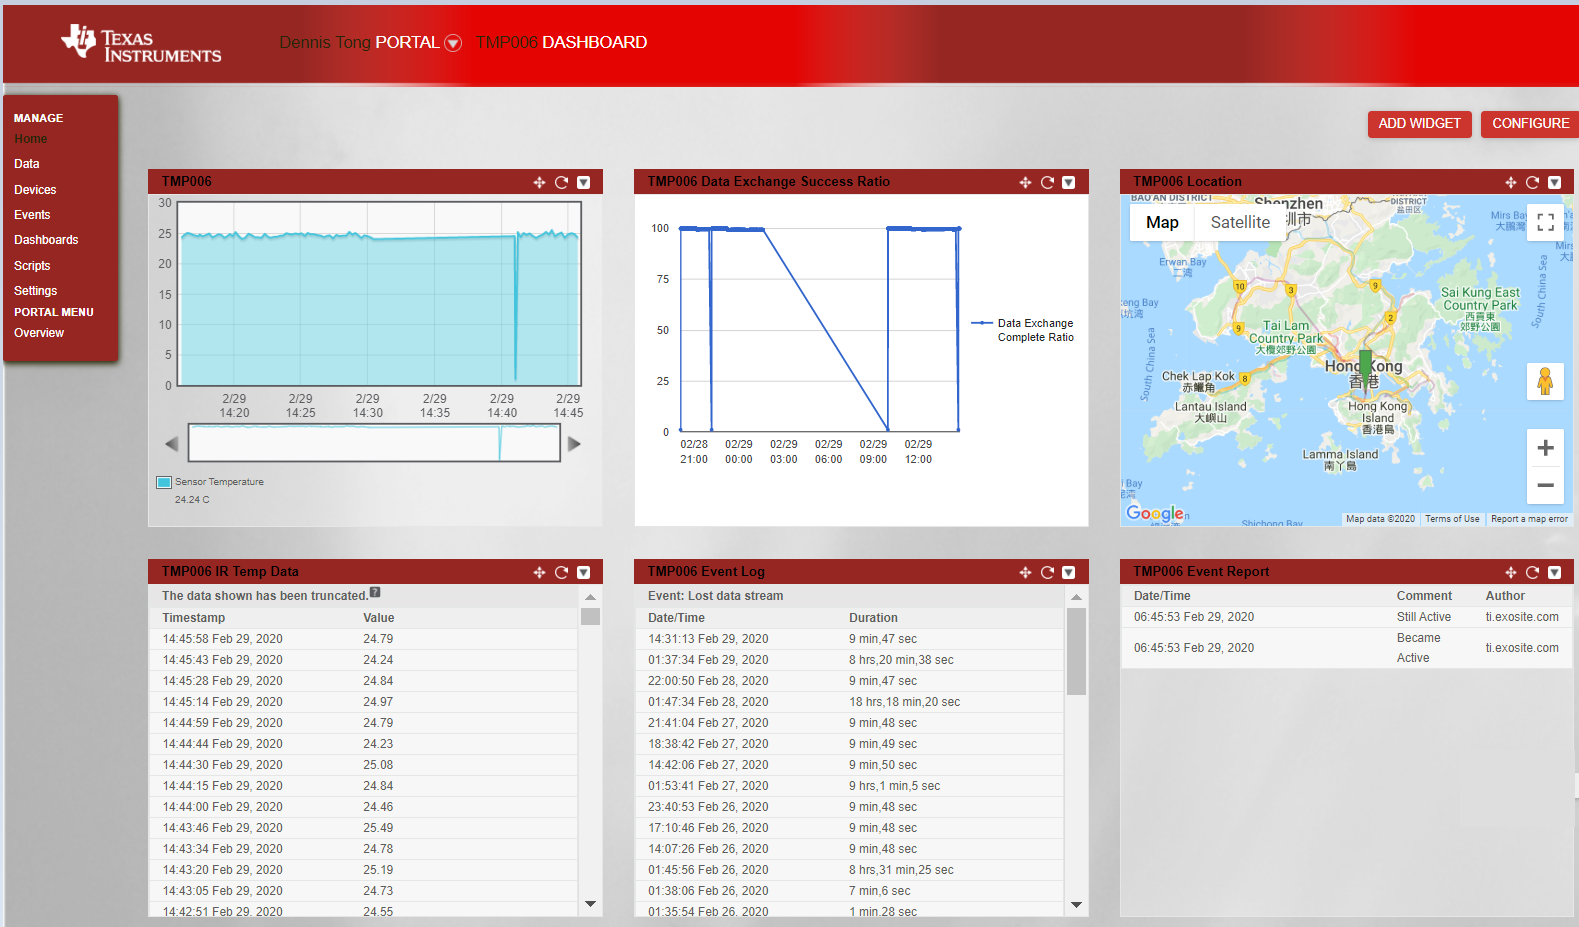
Unfortunately, this freebies is about to end in March 2020. Migrations to Exosite’s paid services should be seamless, but I decided to roll my own on another cloud platform where I can still enjoy limited free services – Amazon Web Services.
The plan is to open up a custom RESTful API on an Apache server to capture the temperature data for future visualization. Code change is easy as the Lua script running in the OpenWRT router is as capable as a high level web component as it handles serial data communication with the lower level microcontroller.
The recent outbreak of COVID-19 world wide is alarming. Using data published by the Johns Hopkins CSSE and NSpire calculator, we are able to perform some basic regression analysis with Nspire calculator to get a rough picture of the outbreak.
The graph below shows data of daily infections outside of China.
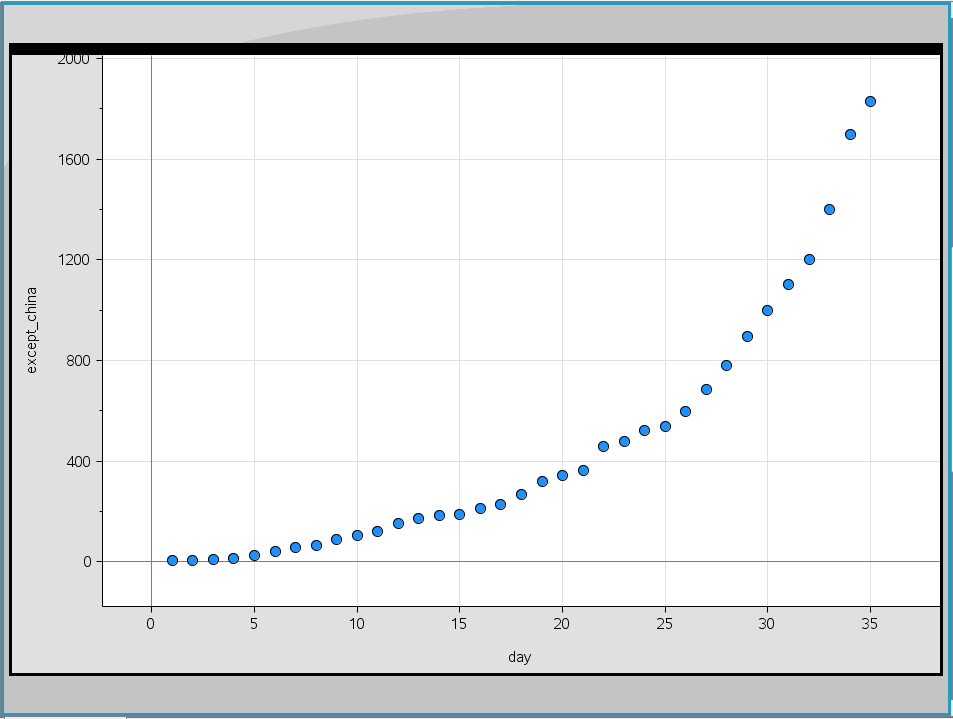
It is showing more of exponential growth than linear. The r squared value is contrasted between the exponential (0.91) and linear regression analysis (0.81) using the Statistics function built in to the Nspire.
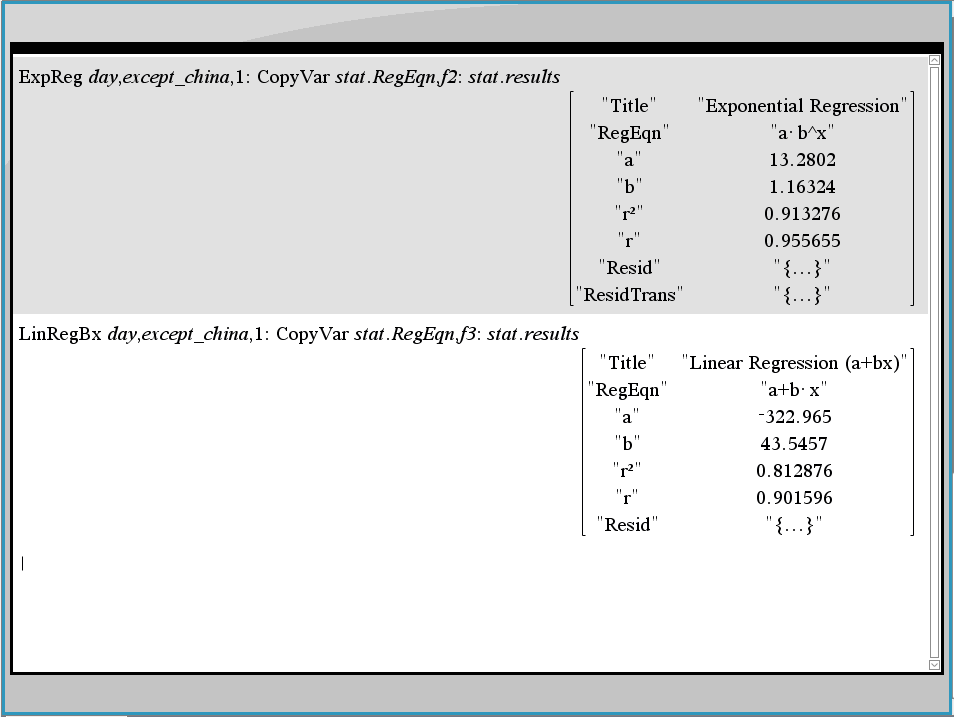
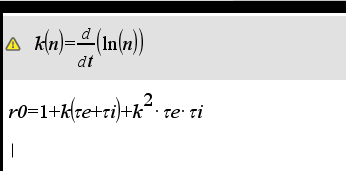
For epidemiology analysis, there are well established mathematics models when fed with accurate data, better descriptions and even reliable predictions are possible. One of the index from these models is the Basic Reproduction Number, known as R0 value, which indicates how many more infections from an infected individual can infect other uninfected individual. By far the estimation for COVID-19 is from 1.4 to 6.6.
Got my hands on some OLED display boards that are neat and nice in 0.96 inch with 128×64 pixels. Previous versions of it is monochrome. The upgraded version is a clear and crisp display in yellow and blue color. Adding a little display to development boards is always an item on my to do list to replace LED signals deciphering. Due to board space limitations very few development boards come with one.

This OLED display runs in I2C mode. On the Arduino Yun the SDA/SCL pins are next to the RJ45 jacket. Fortunately these pins are aligned to the OLED board in the same order the OLED board will fit “inside” of the Arduino rather than the other way round.

The next problem is to feed the Vcc and GND for power. The space is so tight with the RJ45 jacket, I have to resort to soldering a short pair of power cable and then run it to the power supply pins.

After confirming the OLED display is working properly, it is time to show something on it.
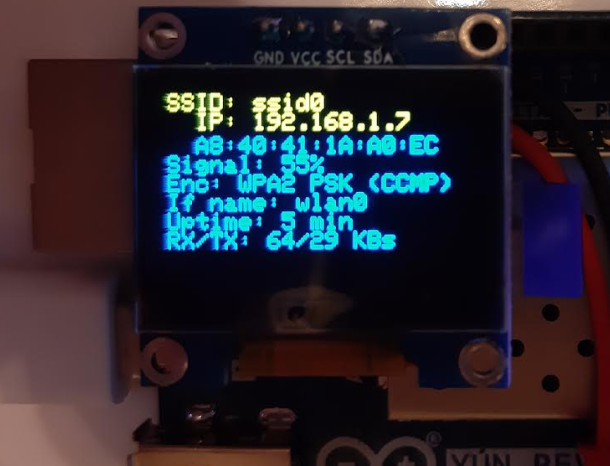
With the Wifi capability of Arduino Yun, there are a lot of information to show. The code below is modified from the Arduino IDE example of WifiStatus. To fit the information on a tiny OLED display, the lua script this example code used is also modified so that all lines fit nicely.
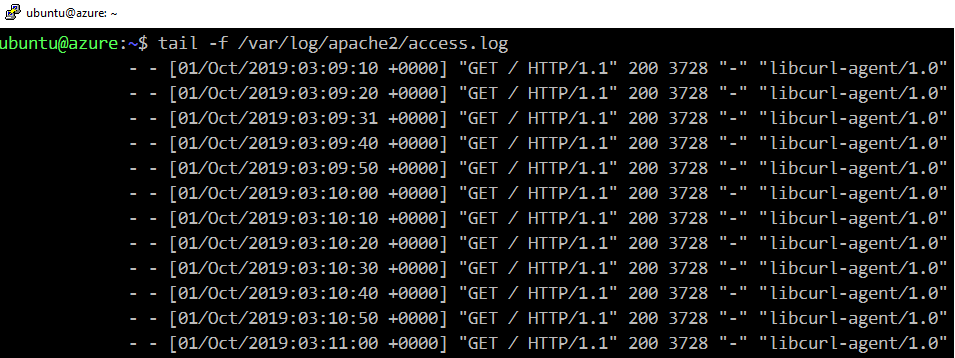
libcurl library is included in the Azure Sphere SDK. For IoT applications web service calls are almost a pre-requisite to connect everyday objects to the Internet. Being able to invoke web service as convenient as the Azure Sphere is definitely an advantage.
Sample application is available at git hub. Open with Visual Studio the HTTPS_Curl_Easy solution. This project defaults to open example.com. To change to the web service desired, first update the app_manifest.json file for the allowed host.
{
"SchemaVersion": 1,
"Name": "HTTPS_Curl_Easy",
"ComponentId": "20191001-0000-0000-0000-000000000000",
"EntryPoint": "/bin/app",
"CmdArgs": [],
"Capabilities": {
"AllowedConnections": [ "example.com", "your.webserver.com" ]
},
"ApplicationType": "Default"
}
Then open the main.c file and point the Azure Sphere to the Internet.
 if ((res = curl_easy_setopt(curlHandle, CURLOPT_URL, "http://your.webserver.com/")) != CURLE_OK) {
LogCurlError("curl_easy_setopt CURLOPT_URL", res);
goto cleanupLabel;
}
Check the log from web server.
The Avnet Azure Sphere Starter Kit is a development board featuring the Azure Sphere module with a MT3620 processor. It is designed for end-to-end IoT with security in mind, and is tightly integrated with the Azure cloud service.
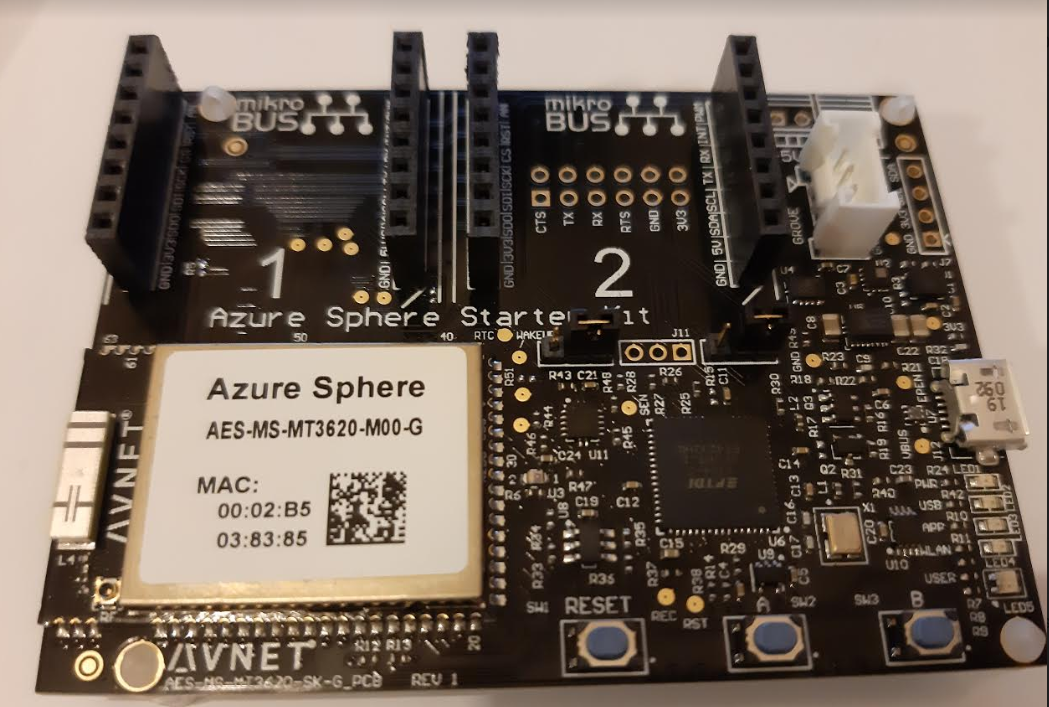
To try out developing IoT solutions using this kit, Visual Studio 2017 or 2019 is required. The Azure Sphere SDK can added to Visual Studio. An Azure account is needed to create an Azure Directory user in the cloud. For details of these preparations, Microsoft provided step by step instructions.
Out of the box, the kit has to be connected to a PC with Internet access via a USB cable (one is included in the kit). The driver should self install. Once connected, open up the Azure Sphere Developer Command Prompt. Each kit has to be registered to the Azure cloud before it can function. The following outline the basic commands to complete the registration.
azsphere login

azsphere tenant create --name sphere01-tenant

azsphere device claim

azsphere device show-ota-status

azsphere device recover

azsphere device wifi show-status

azsphere device wifi add --ssid  --key
After completed the basic registration and Wifi setup, issue the command below to ready the Azure Sphere to work with Visual Studio in debug mode.
azsphere device prep-debug
At this point, open Visual Studio, and pull a sample project from Github. For example, the demo project at https://github.com/CloudConnectKits/Azure_Sphere_SK_ADC_RTApp. Compile and debug the project.

Observe the Output window to see the data fetched from the Azure Sphere. In Sphere’s terms, this is called side-loading a program.
Once the debugger exits, the Sphere will no longer run the program. To deploy the program in a more permanent manner, use the following commands to do an Over the Air (OTA) deployment.
azsphere feed list
--> [3369f0e1-dedf-49ec-a602-2aa98669fd61] 'Retail Azure Sphere OS'
azsphere device prep-field --newdevicegroupname  --newskuname

azsphere device link-feed --dependentfeedid 3369f0e1-dedf-49ec-a602-2aa98669fd61 --imagepath "C:\Users\dennis\source\repos\AvnetAzureSphereStarterKitReferenceDesign1\AvnetStarterKitReferenceDesign\bin\ARM\Debug\AvnetStarterKitReferenceDesign.imagepackage" --newfeedname sphere01-test-avnet --force
Adding feed with ID 'e9243998-58b1-42c5-a7a3-7d76e55e5603' to device group with ID '193d1734-f1e3-4af1-a42e-e4e0a99f585c'.
Creating new image set with name 'ImageSet-Avnet-Starter-Kit-reference-V1.-2019.09.21-12.17.22+08:00' for images with these IDs: 4ae124ed-503a-4cf2-acf9-198c3decd55d.

(reboot)

azsphere device image list-installed

azsphere device prep-field --devicegroupid 193d1734-f1e3-4af1-a42e-e4e0a99f585c
